The DIY Case for DEF Maintenance
If you own a modern diesel truck—whether it’s a Ford Powerstroke, a Chevy Duramax, or a heavy-duty Freightliner—you know that the “Service DEF” warning is the start of a potentially expensive journey. However, a large percentage of DEF system failures are not “broken” parts, but simply “dirty” ones. Urea is a salt, and like any salt, it builds up over time.
Performing a DIY cleaning of your DEF injector (also called a dosing valve) can save you a $600 trip to the dealership and keep your truck out of “Limp Mode.” This guide provides a professional-level walkthrough for removing, cleaning, and testing your injector using basic tools and common sense.
Safety and Preparation
Before you crawl under the truck, there are three critical rules to follow:
- The Exhaust is Hot: The DEF injector is bolted directly to the exhaust pipe. Wait at least two hours after driving before touching it.
- DEF is Corrosive: While not toxic, DEF will corrode aluminum, copper, and your skin if left to dry. Wear nitrile gloves and safety glasses.
- The System is Pressurized: Even with the engine off, the DEF lines may hold residual pressure. Disconnect the line slowly.
Tools You Will Need
- Basic socket set (usually 8mm, 10mm, and 13mm).
- Small flat-head screwdriver.
- A clean bowl or container.
- Distilled Water (Do not use tap water).
- A new DEF injector gasket (highly recommended).
- Nitrile gloves.
Step 1: Locating and Accessing the Injector
The DEF injector is located on the exhaust pipe, usually between the Diesel Particulate Filter (DPF) and the SCR catalyst brick. Look for a component with a plastic electrical connector and a single stiff plastic line attached to it. It is typically held in place by a V-band clamp or two small bolts.
Step 2: Removal Procedure
- Disconnect the Electrical Plug: Gently pull the locking tab (usually red or grey) and squeeze the connector to remove it. Inspect the pins for green “crust”—this indicates a leak.
- Disconnect the DEF Line: These lines use a “quick-connect” fitting. Squeeze the two tabs and pull. Have a rag ready, as a small amount of DEF will leak out.
- Unbolt the Injector: Remove the bolts or the V-band clamp. If the injector is stuck, do not pry it with a crowbar. Wiggle it gently; it is likely held in by urea “cement.”
Step 3: The Cleaning Process (The Soak)
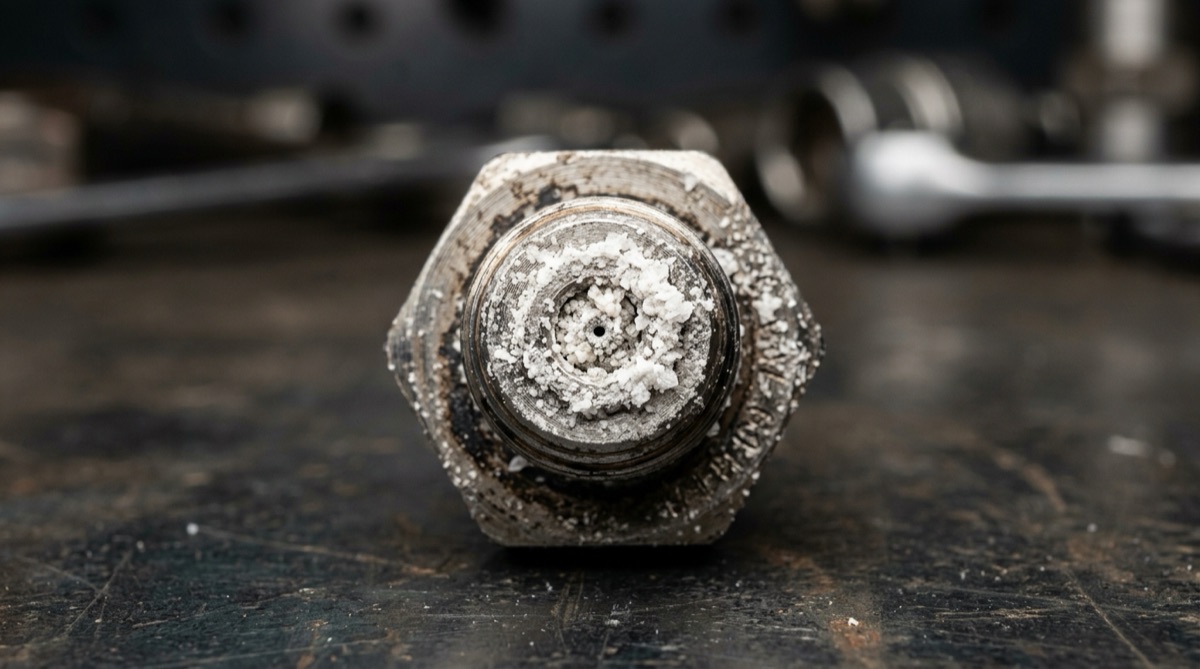
Once the injector is out, you will likely see a mountain of white crystals on the tip. This is what’s blocking your spray.
- Heat the Water: Warm up about 2 cups of distilled water to roughly 140°F (hot to the touch, but not boiling).
- Submerge the Tip ONLY: Place the injector in the water so that only the stainless steel tip is submerged. Do not submerge the plastic housing or the electrical connector.
- Wait: Let it soak for 30 to 60 minutes. You will see the white crystals slowly dissolve and fall away.
- Agitate: Swirl the injector in the water. You can use a soft-bristled toothbrush to gently clean the exterior, but never poke anything into the tiny nozzle holes.
Step 4: Inspection and Testing
Once the tip is clean and shiny, look at the nozzle holes under a bright light. They should be clear and perfectly round.
- The “Blow” Test: Some technicians use a small piece of clean tubing to blow low-pressure air (using their mouth, not a compressor) through the inlet. You should feel a tiny amount of resistance, but no complete blockage.
- Resistance Check: If you have a multimeter, touch the two pins in the electrical connector. You should see between 12 and 15 ohms. If it reads “OL” (Open Loop), the injector is dead internally and the cleaning was for nothing.
Step 5: Re-installation
- Clean the Mounting Surface: Use a damp rag to wipe the exhaust pipe’s mounting hole. Ensure no crystals fall into the exhaust.
- Use a New Gasket: The metal gasket is a “crush” style. Re-using the old one often leads to leaks, which will cause new crystals to form within weeks.
- Torque the Bolts: Tighten the bolts evenly. Do not over-tighten, as the exhaust pipe metal can be brittle from heat cycles.
- Reconnect and Prime: Plug in the electrical and fluid lines. When you start the truck, the system will automatically prime itself.
Step 6: Clearing the Codes
After cleaning, the “Check Engine” light may stay on. You will need an OBD-II scanner to clear the codes (usually P204F or P208E). Some trucks require a “Reductant System Reset” or a “Service Regeneration” to fully exit the derate mode. If the light comes back on after 20 miles, the injector likely has an internal failure that cleaning couldn’t fix.
FAQ: DIY Cleaning Tips
Q: Can I use vinegar to dissolve the crystals?
A: No. Vinegar is acidic and can react with the trace metals in the SCR system. Hot distilled water is the safest and most effective solvent for urea.
Q: My injector is “stuck” in the pipe. How do I get it out?
A: Pour some hot water over the base of the injector while it’s still attached to the pipe. This will dissolve the urea “glue” holding it in place.
Q: What if I accidentally get water in the electrical plug?
A: Use compressed air to blow it out immediately and let it dry for several hours. Use a dab of dielectric grease when reconnecting to prevent future corrosion.
Q: How often should I do this?
A: If you do a lot of city driving or idling, once a year (before winter) is a great preventative maintenance habit.
Recommended Resources and Products:
- Internal Blog: Top 5 Signs Your DEF Injector is Failing
- Related Product: Mercedes-Benz BlueTEC Urea Dosing Valve
- External Authority: Distilled Water Standards
- Technical Reference: ISO 22241 Diesel Exhaust Fluid Standards
